Discord; the land of teenagers, weebs, and grassless individuals. Past the degeneracy, however, is a feature-rich chat application, and is something we can use as a vessel for a pretty cool machine-learning tool.

The Goal:
At the end of this tutorial, I will show you how to:
- Use either text or voice to communicate to your cloned self in real-time on any discord server using state of the art GPT3
- Combine my previous tutorials (voice and text cloning) into one project
- Set up your own discord bot
- Expand or modify the bot to your liking
Requirements:
- A modern computer
- Anaconda already installed on your PC
- Understanding of how to use Discord
- OpenAI Account
- NOTE: Done on Debian Linux, may be slightly different in Windows
Recommended (But Not Needed):
- Completed my GPT3 tutorial
- Completed my Voice Synth tutorial
Time:
Voice Synthesis: 12+ Hours (Optional)
Text Generation: 6+ Hours (Optional)
Getting Discord Set Up: 1 Hour
Total: 18+ Hours
WARNING: This is not a production-quality piece of code, please DO NOT use this on large servers due to potential security flaws, this is only meant as a fun tool, and I am not responsible for any unforeseen flaws.
lSTEP ONE: Creating a Discord Bot
We can't exactly work with a discord bot without, you know, having a discord bot. To remedy this, visit the Discord Developer Portal and follow the following steps:
https://discord.com/developers/applications
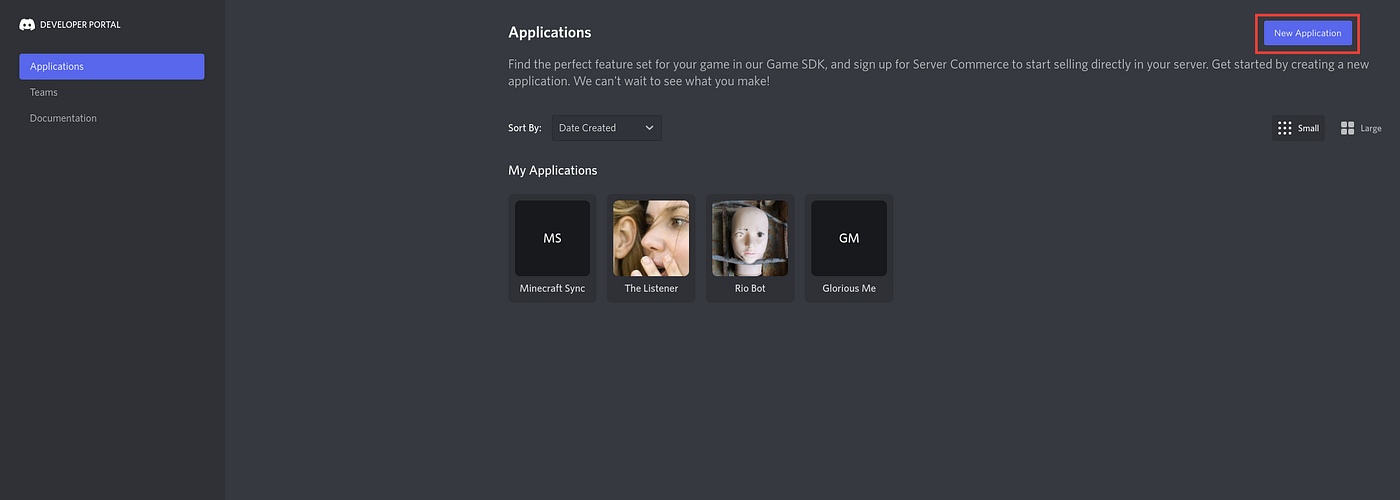
You will land on this webpage, you probably won't see other bots in the dashboard — that's ok! We will be seeing one in a bit.
Click “New Application” on the top right.
Make a quirky name to please your hopeless desire to be funny, and press “Create”
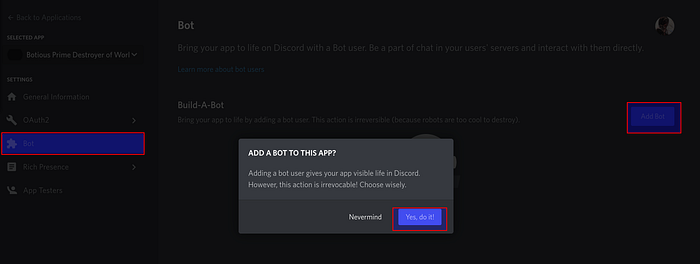
Next, go to the bot menu on the left, and create a new bot
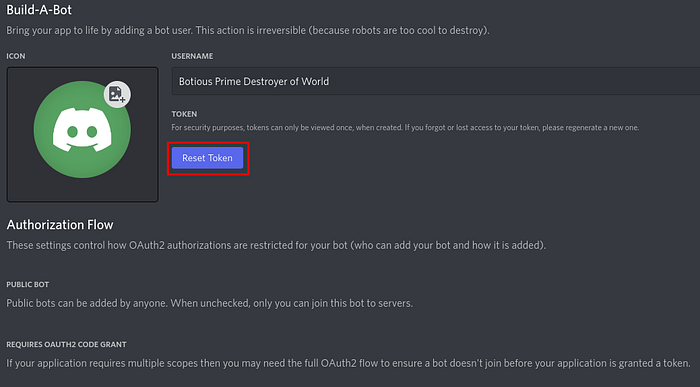
To connect our PC to discords API, we need to save our discord token by hitting “Reset Token” and copying our code for later.
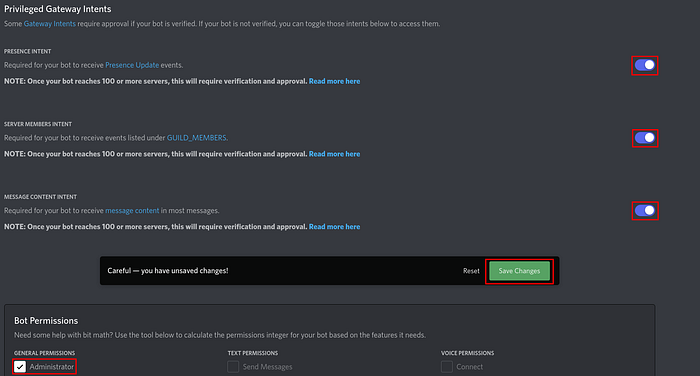
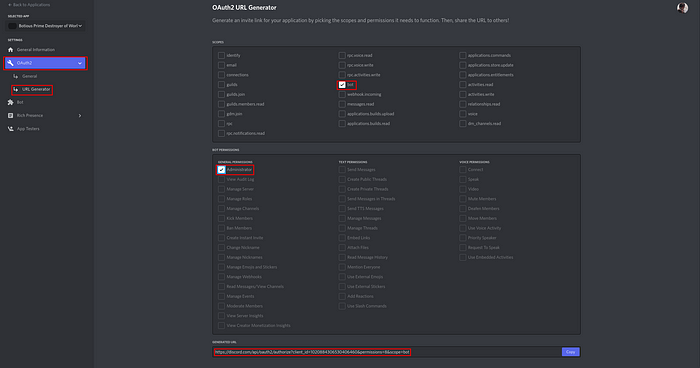
In order to use all the features of the discord bot, scroll down and enable privileged gateway intents, and administrator permissions
In order to invite this new discord to a server, we have to create an invite link head to OAuth2 < URL Generator and enable the proper permissions, and open the URL in your browser of choice. Invite the bot to a server, and we can get the ball rolling!
lSTEP TWO: Creating a Conda Environment
To keep everything nice and organized, create a folder in your place of choice (I won't judge where) and open up your conda terminal and create an environment in your folder location
conda create -n discordBot
conda activate discordBot
Next, due to the lack of native recording support on pycord (the python library used to communicate with you guess it, discord), I have made some customizations on a fork which you need to install using the code below:
python3 -m pip install git+https://github.com/rioharper/pycord-transcription.gitlSTEP THREE: Signing Up for Google Cloud (Optional)
In order for live voice transcription to be used on voice calls, we will also need to sign up for a google cloud account. I'll assume you've already sold your soul to the devil and have a regular google account. Log in to the console with this link
https://console.cloud.google.com
Agree with the terms and services, yadda yadda, then create a project with whatever name you think of, and continue.
You will end up here, at the google console homepage for your project. In order to enable google voice transcription, you will need to enable the API with the following steps:


After being enabled, you now have to create the API key (the one that connects your program to the Google Cloud) which you can do by visiting the google API credential page here. Go to Create Credentials > API Key > Copy your API key and put it in a safe space. You may also want to restrict your API key to only using Google Speech API and your IP, to minimize the potential damage if your key is compromised.
Out of the web and onto your local machine, we need to install the necessary library files. Open your terminal back up, and login to your account by inputing the commands
conda install -c conda-forge google-cloud-sdk
gcloud auth application-default login
and connect to the same google account with the project previously created. It will create a credentials file, which you will want to copy to the folder containing the Discord bot. One command I always use to avoid any potential credential bugs is
gcloud auth application-default set-quota-project "YOURPROJECTNAME"We can now transcribe audio on discord!
lSTEP Four: Installing The Discord Bot
Enough signing up for stuff, that's not what you came for, and it is boring as hell to write. cd into your discord bot folder and git clone my repository and install all the various library files with
git clone https://github.com/rioharper/AIDiscordBot
cd AIDiscordBot
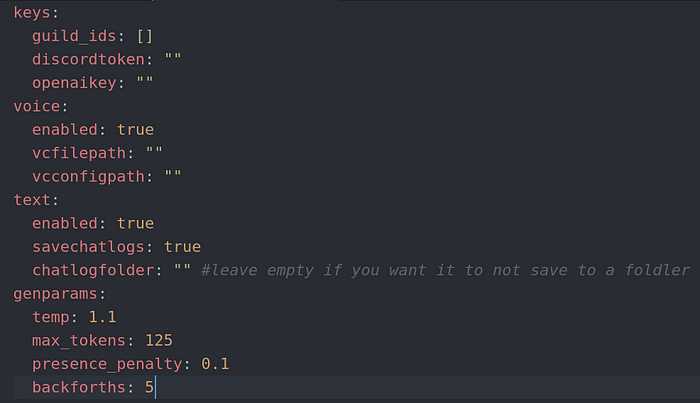
pip install -r requirements.txtOn file explorer or what have you, open config.yml and you will be greeted by the following:
Keys
guild_ids:
A list of server ids that are known as “debug” servers, or ones you one to see the code changes immediately, vs other non-debug servers that will take a while to see code changes propagate. To copy your server's ID, right-click your server icon on discord, and click “Copy ID”. You can include several servers if needed.
discordtoken (str):
Remember that discord token you saved? Now, we want to go ahead and copy it into the discordtoken string value (remember, don't publish your token, or anyone can control your bot!)
openaikey (str):
Similar to the discordtoken, we want to copy our API key from OpenAI. I didn't cover how to openaikey:
openaikey (str):
Sign up for OpenAI but it's a fairly simple sign-up process, and you can copy your key here.
Voice:
enabled (bool):
If you have signed up for Google Speech-To-Text and have a voice model from my previous tutorial, you can go enable the ability for the bot to join a voice channel.
vcfilepath/vcconfigpath:
The path to both your .json config file and the .tar file of your voice model.
Text:
enabled (bool):
This section is optional, but assuming you both have a Coqui TTS voice model (as done with my previous tutorial) and signed up for Google Speech-To-Text, you can leave it as enabled. Otherwise, you can disable it so it won't show up as an option.
savechatlogs (bool):
Chatlogs are text files that are a log of each conversation a user interacts with the bot. This could be used for later data processing or just a list of everything funny the bot has said. You can disable this feature by making this value false.
chatlogfolder (str):
Assuming you have enabled chatlogs, you can specify what folder they should save to. If you just want it to save in the folder with the python scripts, just paste the path to the folder with the config file.
Generation Params:
I covered these in more detail here but a brief synopsis:
Temperature: The “Creativity” of the text generation (0.1–1.5)
Max_Tokens: The maximum length of the generation (1–255)
Presence Penalty: How often does the bot change the conversation
Backforths: How many interactions does it take in a conversation to “reset” and forget about the previous chats
lSTEP Five: Launching the AI
Now for the fun part!
Open up two shells (terminals) with your conda environment activated and cd them both into the folder containing the python scripts, and you will want to execute the following:
- python3 main.py
- python3 runtts.py (if you want to include voice)
Assuming everything goes to plan, both should launch without a hitch. The main.py contains the actual bot, with the runtts.py containing a server in which the voice is generated.
Launch discord, and open up your server of choice that has your bot. In a text channel, enter “/” to bring up the available commands
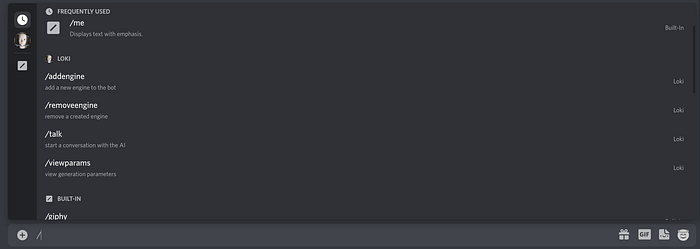
If you have your own custom GPT3 engine (like for instance one made from my tutorial here) you can use the /addengine and include the name you want to display on discord, and the name on OpenAI. You can add as many engines as you would like, so you can have different moods or even different persons entirely, all in the same bot.
If you do not have a custom GPT3 engine, thats fine! It comes with the default engine, so you will be able to use this all the same.
After doing that, you can use /talk to talk to the bot. Choose the form of communication (either speaking in the text channel that you used the command for or a voice channel that you are currently in), and the engine of your choice.
To finish a session, just say “stop” or “stop conversation”
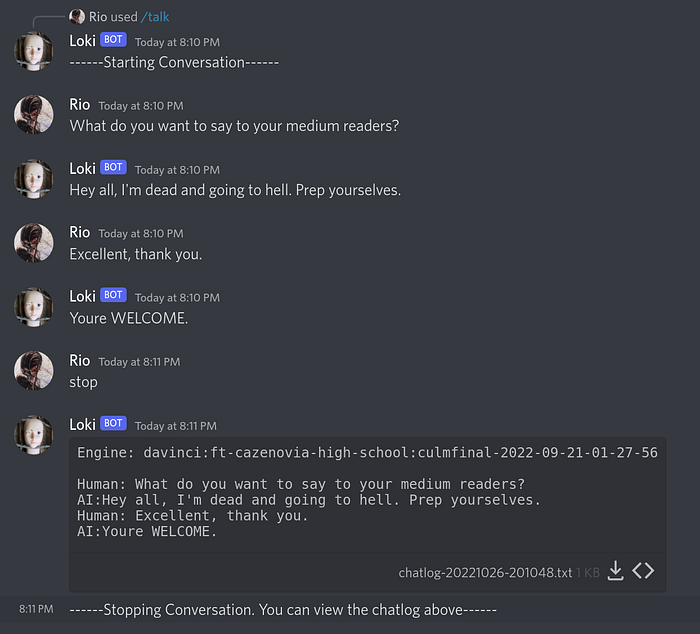
And there you have it! Have fun, and make sure to freak out your friends by making the AI join in on random conversations (its always a blast)
Conclusion
This has been a culmination of the past year or so of learning python, and I am not entirely sure what comes next, but I have some ideas.
One thing I plan to release in a relatively speedy manner is an explainer article detailing how the code works, how you could modify it, etc. The process was surprisingly long and complex, but I think it's well worth sharing.
Of course, if you have any problems with your code, or have an idea/suggestion, feel free to comment down below or get in contact with me at my twitter, @rharpj.